How to Draw Bill of Rights Illustration
Dec 29 , 2020

After the Declaration of Independence in 1776, the Founding Fathers turned to the composition of the states’ and then the federal Constitution. Although a Bill of Rights to protect the citizens was not initially deemed important, the Constitution’s supporters realized it was crucial to achieving ratification. Thanks largely to the efforts of James Madison, the Bill of Rights—the first ten amendments to the U.S. Constitution—were ratified on December 15, 1791.
Facts to know:
1.The US Bill of Rights was created on September 25, 1789.
2. The US Bill of Rights was ratified or approved on December 15, 1791.
3. The US Bill of Rights contains the first 10 amendments to the country’s Constitution.
4. Native Americans were denied from having full American citizenship until 1924.
5. James Madison's ideas came from various sources. Known as the Father of the Constitution, James Madison had drafted the US Bill of Rights based on various sources. To name a few, Madison drew inspiration from the English Bill of Rights, Virginia’s Declaration of Rights, and ideas from the Enlightenment period.
6. President Franklin D. Roosevelt announced December 15th as the Bill of Rights Day.

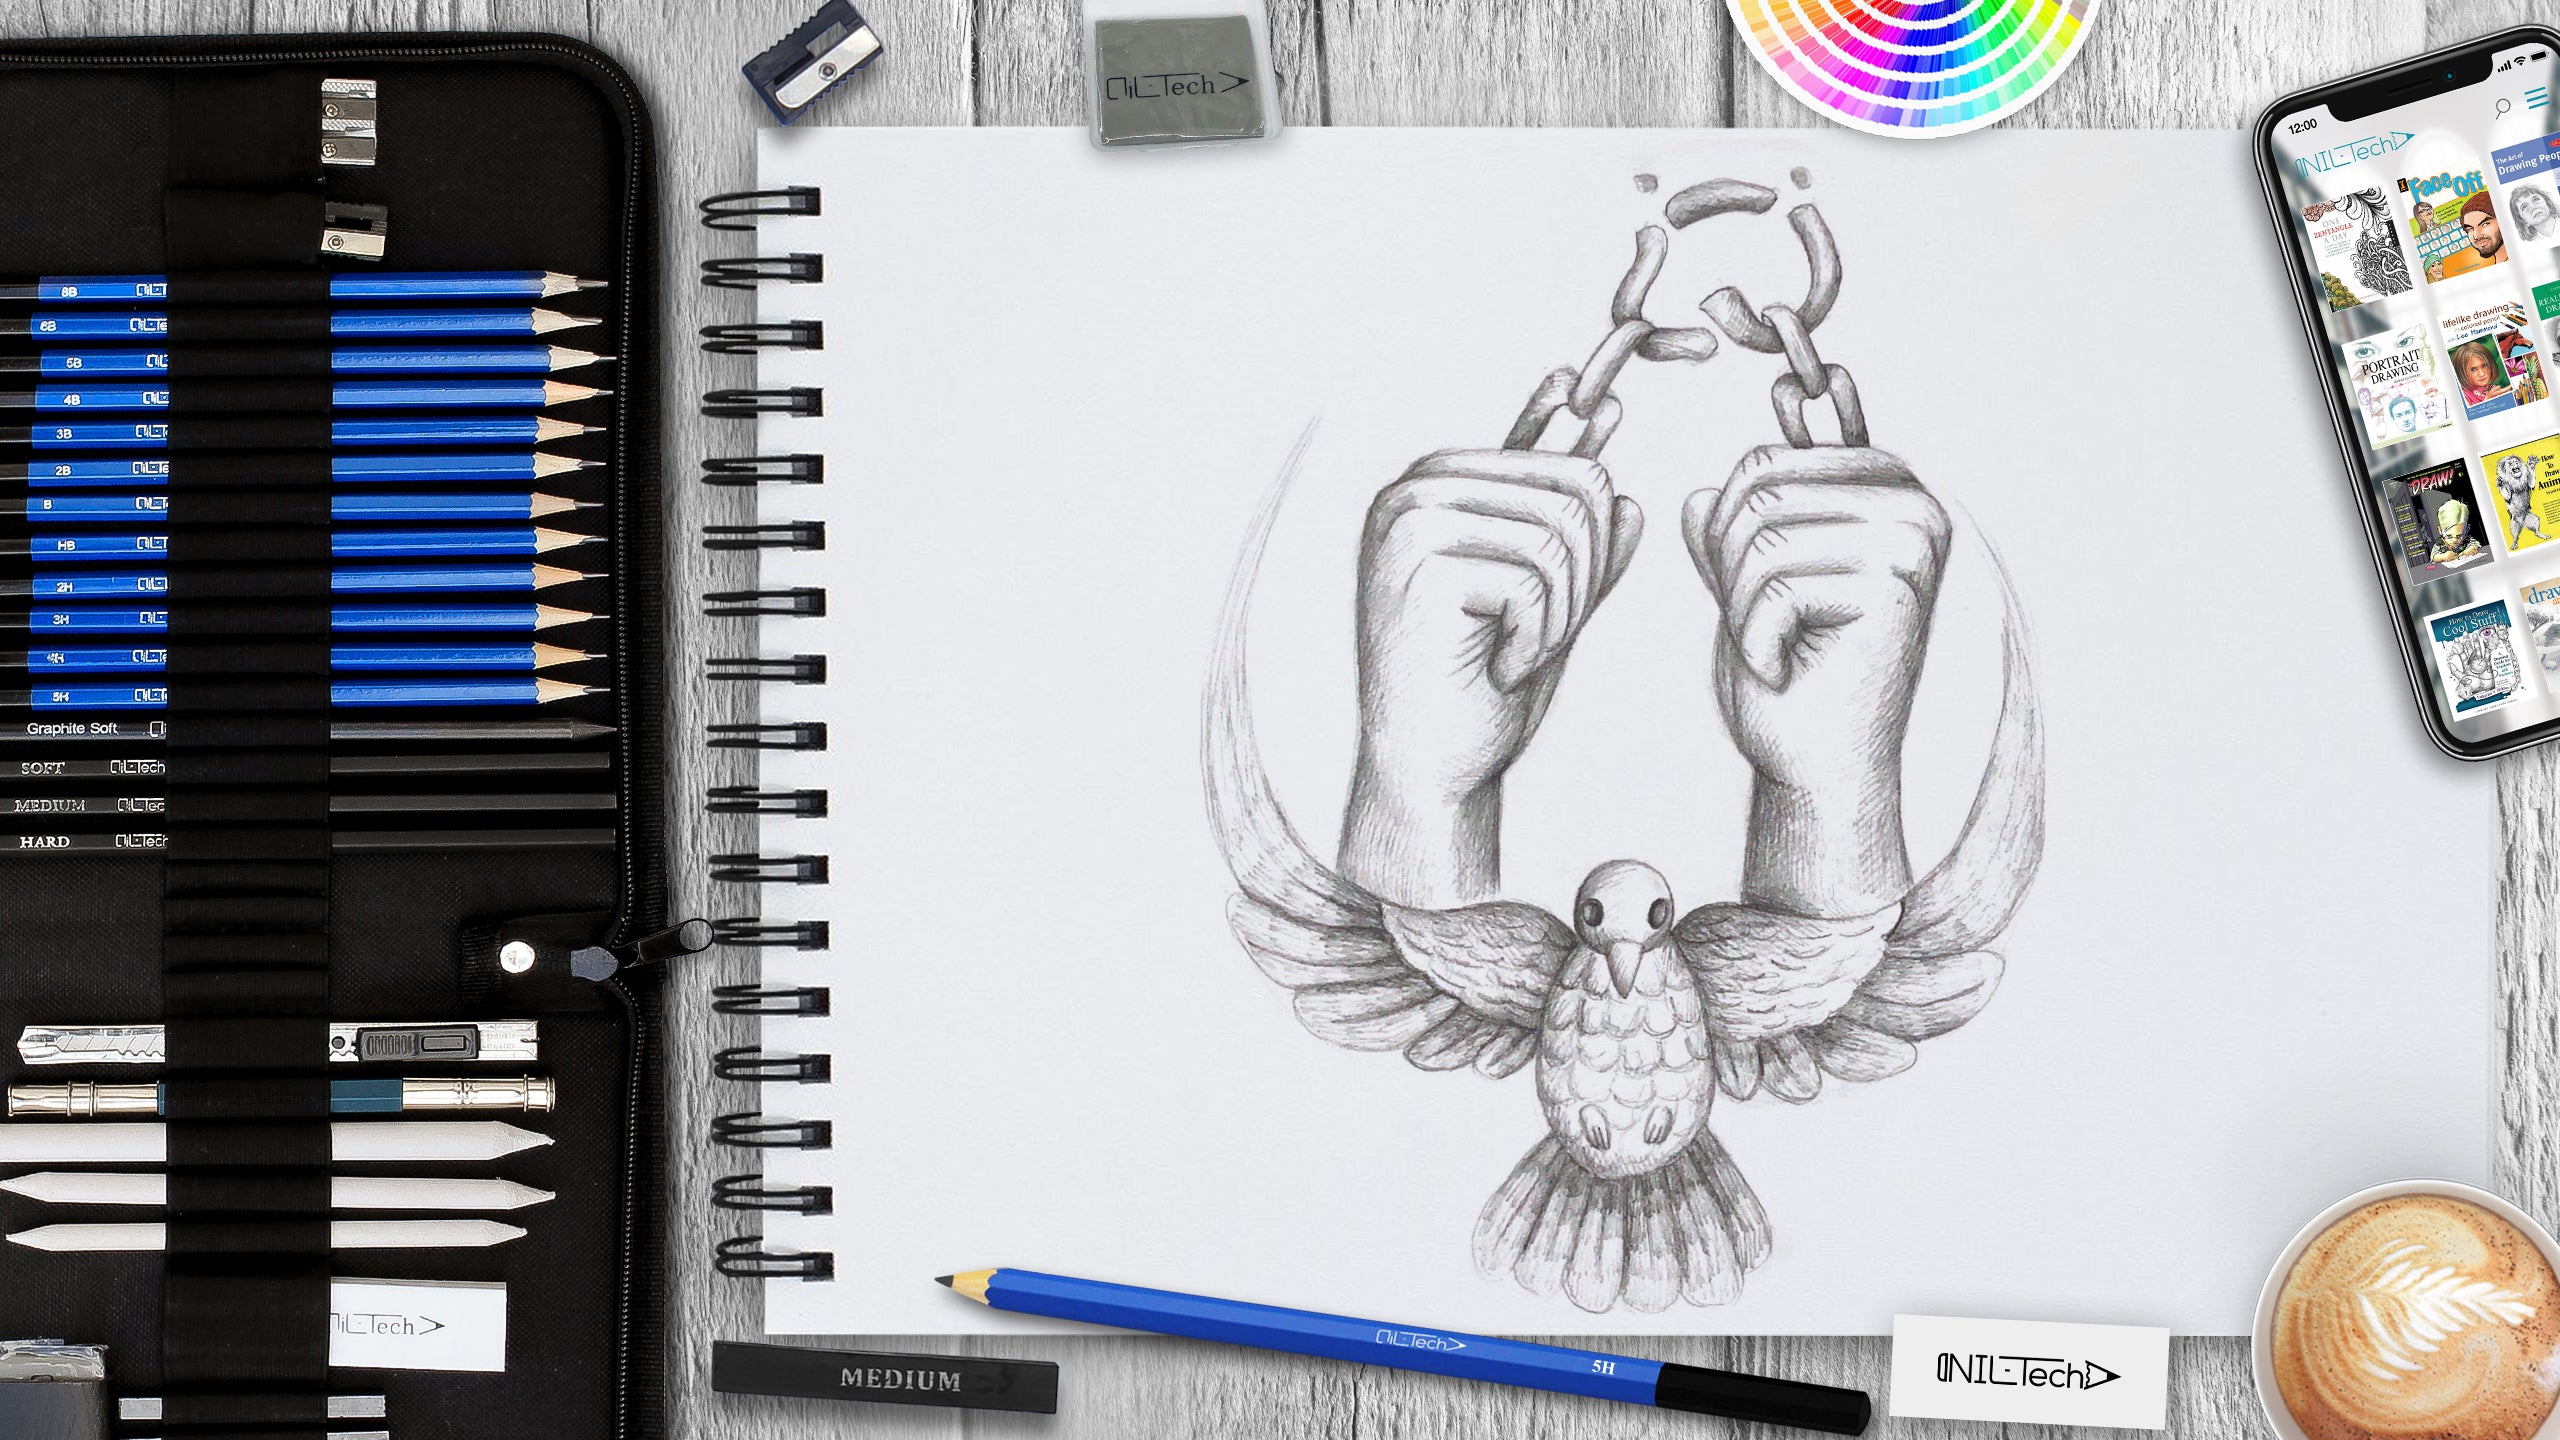
Step 1. We start the construction by using the circles to outline the fists and the body of the eagle, and with the lines we outline the directions of the wings and arms. (Pencil B)

Step 2. We begin to draw the eagle. Draw the head, body, tail and using the guide lines draw the wings. (Pencil B)

Step 3. Add details to the eagle. Draw the eyes, beak and legs, and add feathers on the wings and tail. (Pencil B)

Step 4. We begin to draw the fists from the outline and, using the circles, outline the location of the folds of the fingers. (Pencil B)

Step 5. Draw the fists, draw the fingers using circles, they will be practically invisible, since the brushes are in the fists. (Pencil B)

Step 6. Remove all unnecessary construction lines and add a broken chain on top. (Pencil B)

Step 7. We start shading from the dark areas of the drawing (shadows). (Pencil B)

Step 8. We turn to drawing the fists, for this we take a softer pencil and enhance all the shadows, also add folds on the skin. (Pencil 5B)

Step 9. We turn to drawing the chain, enhance the shadows on it and, most importantly, do not forget about light and shade and shading in shape. (Pencil 5B)
Step 10. The last step is to draw the eagle. Here, in addition to shadows, you need to convey the texture of the feathers, you should hatch using a tone stretch. (Pencil 5B)
 |
Drawing Pencil SetExcellent GIFT IDEA - Non-Toxic and safe, easily portable and made with quality top-notch materials. Basic and innovative drawing supplies come together in NIL Tech set as an exceptional replacement for old-fashioned pencil boxes. The main attraction at any occasion from your drawing enthusiast friends, sketchers, artists to your kids or students boosting their creative projects and enjoy their ear-to-ear smile! |


1 Comments