National Ice Cream Day: Learn How to Draw Delicious Ice Cream!
Jul 16 , 2023
National Ice Cream Day: Learn How to Draw Delicious Ice Cream!
Welcome, creative souls, to our delightful Step by Step drawing tutorial! Today, we're going to embark on a sweet adventure celebrating National Ice Cream Day by creating colorful ice cream cones using fine liners and brush pens. Whether you're a seasoned artist or a budding doodler, this tutorial is here to spread the joy and make art accessible to everyone. So, grab your favorite drawing tools, and let's dive into a world of vibrant flavors and artistic expression!
Ice cream cones are not just scrumptious treats; they also make fantastic subjects for artistic exploration. With their swirls of captivating colors and tantalizing textures, they're perfect for igniting our creative spark. And what better time to celebrate their deliciousness than National Ice Cream Day?
In this tutorial, we'll be working with fine liners and brush pens to bring our ice cream cones to life. Fine liners are excellent for creating precise outlines and intricate details, while brush pens allow us to achieve smooth, flowing strokes and blend colors seamlessly. With these magical tools in our hands, there's no limit to what we can create!
Color is the icing on the cake (or rather, the sprinkles on the cone) when it comes to our artwork. We'll explore a wide range of colors, from rich chocolate browns to soft pastel pinks and blues. Feel free to experiment and let your imagination run wild as you choose your own color combinations. This is your chance to create a personal gallery of mouthwatering ice cream illustrations that truly reflect your style and taste!
But wait, there's more! To make your creative journey even sweeter, we have a video guide to accompany this step by step tutorial. This video will be your trusty companion, showing you the techniques and process in real-time. You can pause, rewind, and replay specific parts as many times as you like, ensuring that you don't miss any of the fun and helpful details.
-
4H Pencil for construction lines
- 2B Pencil for the outline
- White vinyl eraser for a quick fix
- Dual Tip Color Brush Pens: Brown, Tan, Light and Dark Blue, Orange, Light and Dark Pink, Purple, Dark Green and Gray
So, my fellow art enthusiasts, ice cream aficionados, and everyone in between, get ready to unleash your imagination! Let's dive into this delightful tutorial, where we'll explore new drawing techniques, indulge in vibrant colors, and celebrate National Ice Cream Day with a touch of artistic flair. Together, we'll create a delectable collection of ice cream cone illustrations that will make your taste buds tingle and your artistic spirit soar. Are you ready? Let's make this National Ice Cream Day a truly colorful and creative celebration!

Step 1. How to draw an outline of the top of an ice cream cone.
We'll be drawing two ice cream cones side by side, using simple shapes. The ice cream on the right will be slightly smaller. Use pencil 4H it is best for construction lines and drawing an outline, plus easy to erase. Start by drawing two circles for the top of the ice cream. Right circle slightly smaller. Shown in Black.

Step 2. How to draw an outline of the top of the cone.
Great! Draw a horizontal rectangle just at the bottom of each circle, this will be the top of our cones. Shown in Red.

Step 3. How to draw body of the ice cream cone.
Awesome! One more step closer to the colorful part. Draw vertical rectangle for each of the ice creams, shown in Blue.

Step 4. How to add detail to the top to show soft serve and cherry.
Draw a small circle at the top of the right ice cream cone (the smaller one). Later this will be a cherry on top! Draw a rectangle at the top of the left (larger one) ice cream cone, pointing up and left. Shown in Orange.

Step 5. How to draw details: create a soft serve, outline sprinkles and give our cones texture.
To create an outline we'll be using 2B pencil. Start with a wavy line between top of the cone and start of the ice cream. This will show how ice cream is melting down the cone hence make it uneven, creating droplets. Next we'll outline the soft serve, ice cream top, by drawing half circle or large waves, as show. Outline the cherry on the smaller ice cream, add a stem. In between the ice creams draw a leaf. Add sprinkle outlines in different shapes: tiny circles, ovals, and small rectangles. Add as many as you like!

Step 6. How to complete the composition.
Every drawing, needs balance what we may call a setting or additional details to create a complete composition pleasing to the eye. To complete our composition we will draw two cherries on the bottom left and one on the right. We will also add leaves on each side just above the cherries.

Step 7. Erasing construction and all unnecessary line. Good chance to re-do and fix anything you may not like.
Great Job! This step is especially important even though it may not seem so. You may think:"No need!"...but this is a perfect opportunity not only to 'clean up' but to assess your artwork. Yes! Take a moment and make sure you like the proportions, all the details and composition. Ask yourself:"Does my work have balance?". If not, take a minute and re-do as many times as needed to get to a "Yes!".

Step 8. Coloring time: outline!
Time to give our work some color! Grab the Brown Dual Tip Color Pen and using the brush side go over all the outlines except the smaller details such as cone texture, sprinkles etc.

Step 9. Coloring time: small detail outline!
Still using the Brown Dual Tip Color Pen but the tip end go over the smaller details such as cone texture, sprinkles etc.

Step 10. Coloring time: use Tan to color in the cones.
Color in both cones ones and then go over again, layering color and creating shadows.

Step 11. Coloring time: use light pink for the smaller cone.
Color in the soft serve part of our smaller ice cream cone, leaving out some of the sprinkles.

Step 12. Coloring time: use light blue for the bigger cone.
Color in the soft serve part of our bigger ice cream cone, leaving out some of the sprinkles. Take advantage of layering to create shadows. Shadows create fullness and realistic effect.

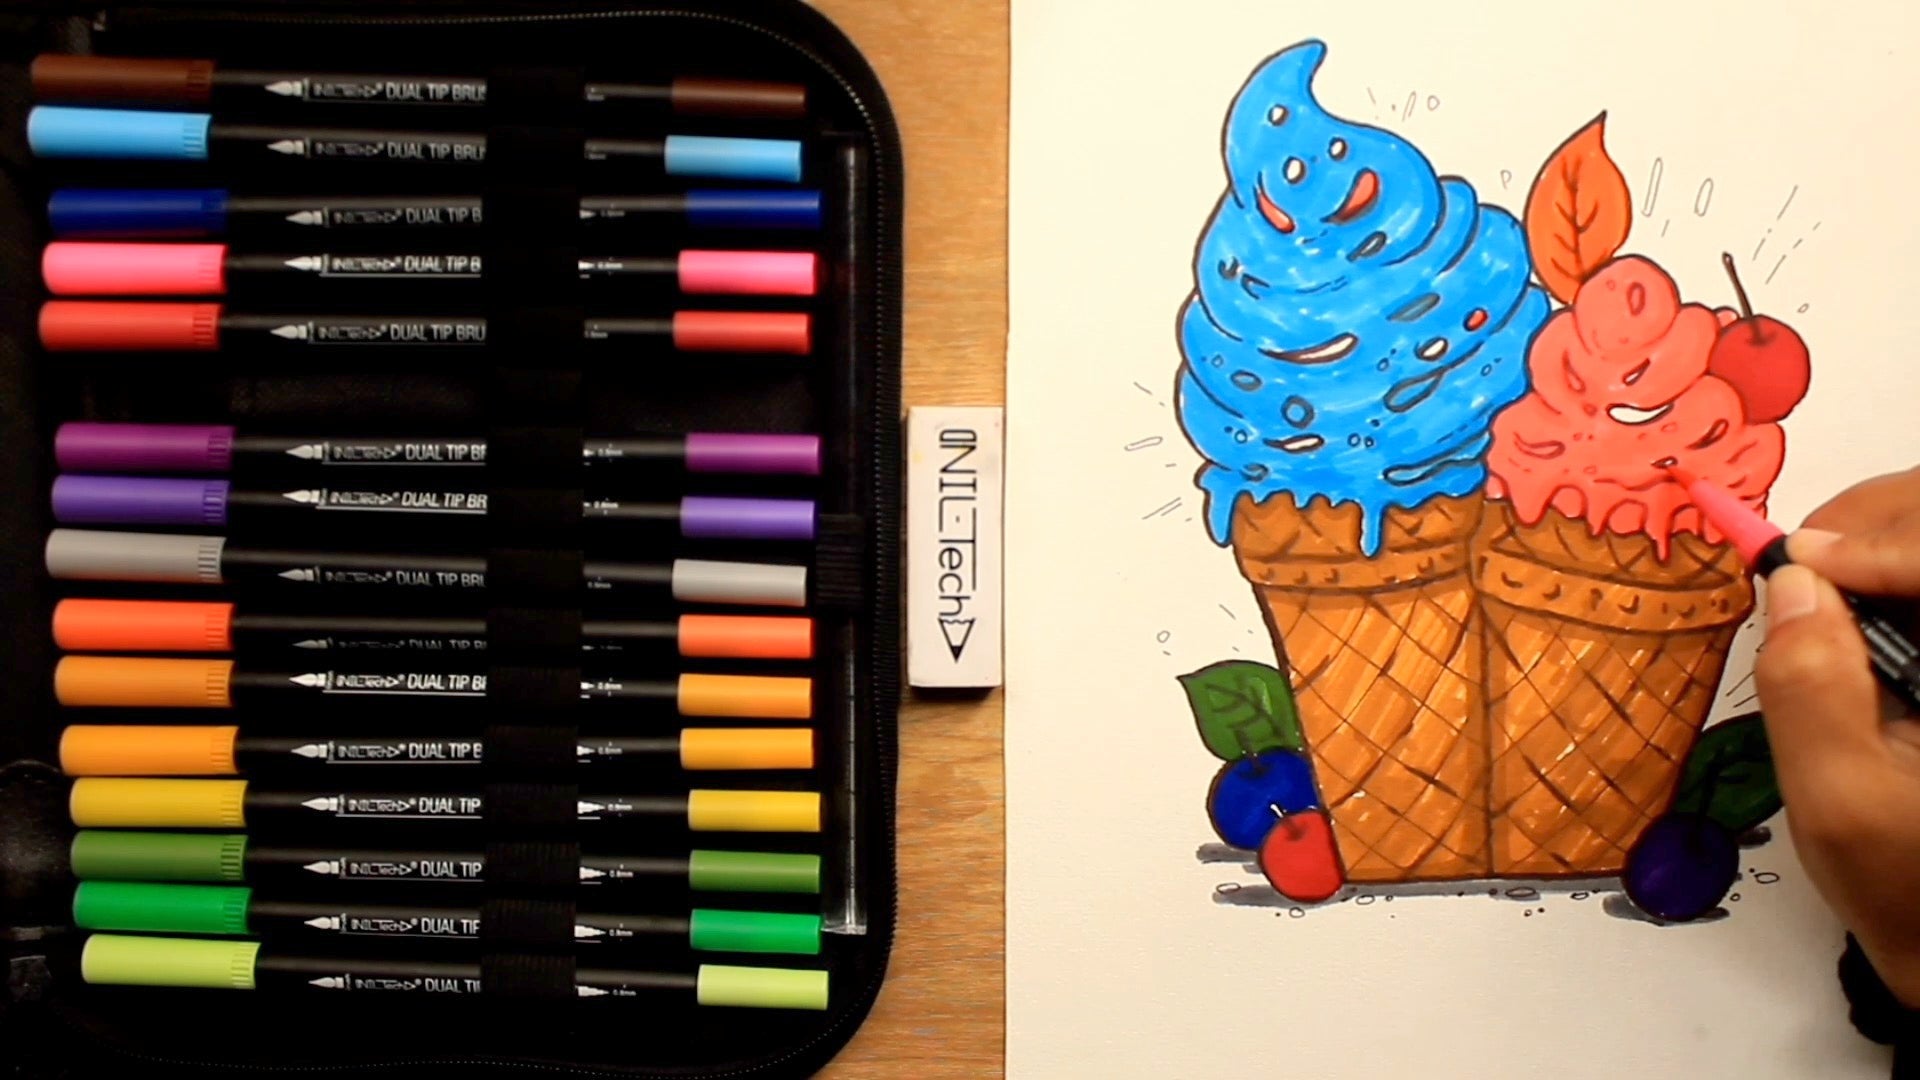
Step 13. Coloring time: use red to color in 2 cherries.
To create balance in our drawing we will color only the top cherry (on the small cone) and bottom left cherry in red.

Step 14. Coloring time: use purple to color the remaining cherries.
Remaining cherries will be purple! This will help us balance the blues and pinks.

Step 15. Coloring time: use dark green to color the bottom leaves.
Remaining cherries will be purple! This will help us balance the blues and pinks.

Step 16. Coloring time: use orange to color the top leaf.

Step 17. Coloring time: use gray to create a surface that the cones are standing on.

Step 18. FINAL STEP! Coloring time: use dark pink to color in the Sprinkles!
Congratulations! YOU DID IT
Thank you for joining us in celebrating National Ice Cream Day! Don't miss out on the accompanying video guide for a more immersive experience—click on the video below and let the magic unfold on your screen!
If you fell in love with the art supplies used in this tutorial, you can bring them home by clicking the link below. Continue your artistic adventures and explore a world of creativity at your own pace.
36 PCS Fine Point Pen and Dual Tip Color Brush Pen Art Set
Share your unique ice cream cone creations with us on social media using #IceCreamArtJoy. Let's spread the sweetness and inspire others to unleash their creativity too!
Thank you once again for joining us. Keep creating, keep exploring, and may every day be as delightful as a scoop of your favorite ice cream. Until next time!
Click here to watch the video guide and explore the art set used in this tutorial:
 |
Drawing Pencil SetExcellent GIFT IDEA - Non-Toxic and safe, easily portable and made with quality top-notch materials. Basic and innovative drawing supplies come together in NIL Tech set as an exceptional replacement for old-fashioned pencil boxes. The main attraction at any occasion from your drawing enthusiast friends, sketchers, artists to your kids or students boosting their creative projects and enjoy their ear-to-ear smile! |