Master Vibrant Tie-Dye & Doodle Easter Eggs: The Ultimate Brush Pen Guide
Mar 29 , 2024
🎨🥚 Add a Splash of Color to Your Easter with Our Latest Tutorial!
Hello Creative Spirits!
As we hop into the Easter season, it's time to roll up our sleeves, gather our art supplies, and dive into a fun-filled activity that's sure to brighten up your home and bring smiles to your family's faces. We're thrilled to announce our latest DIY tutorial: Tie-Dye Easter Eggs with Brush Pens!
Why settle for ordinary, store-bought Easter eggs when you can create your very own vibrant, tie-dye wonders? Our latest guide is perfect for artists of all ages and skill levels, promising an egg-citing adventure into the world of color and creativity.


Here's What You'll Need:
- Hard-boiled eggs or faux Easter eggs – your canvas awaits!
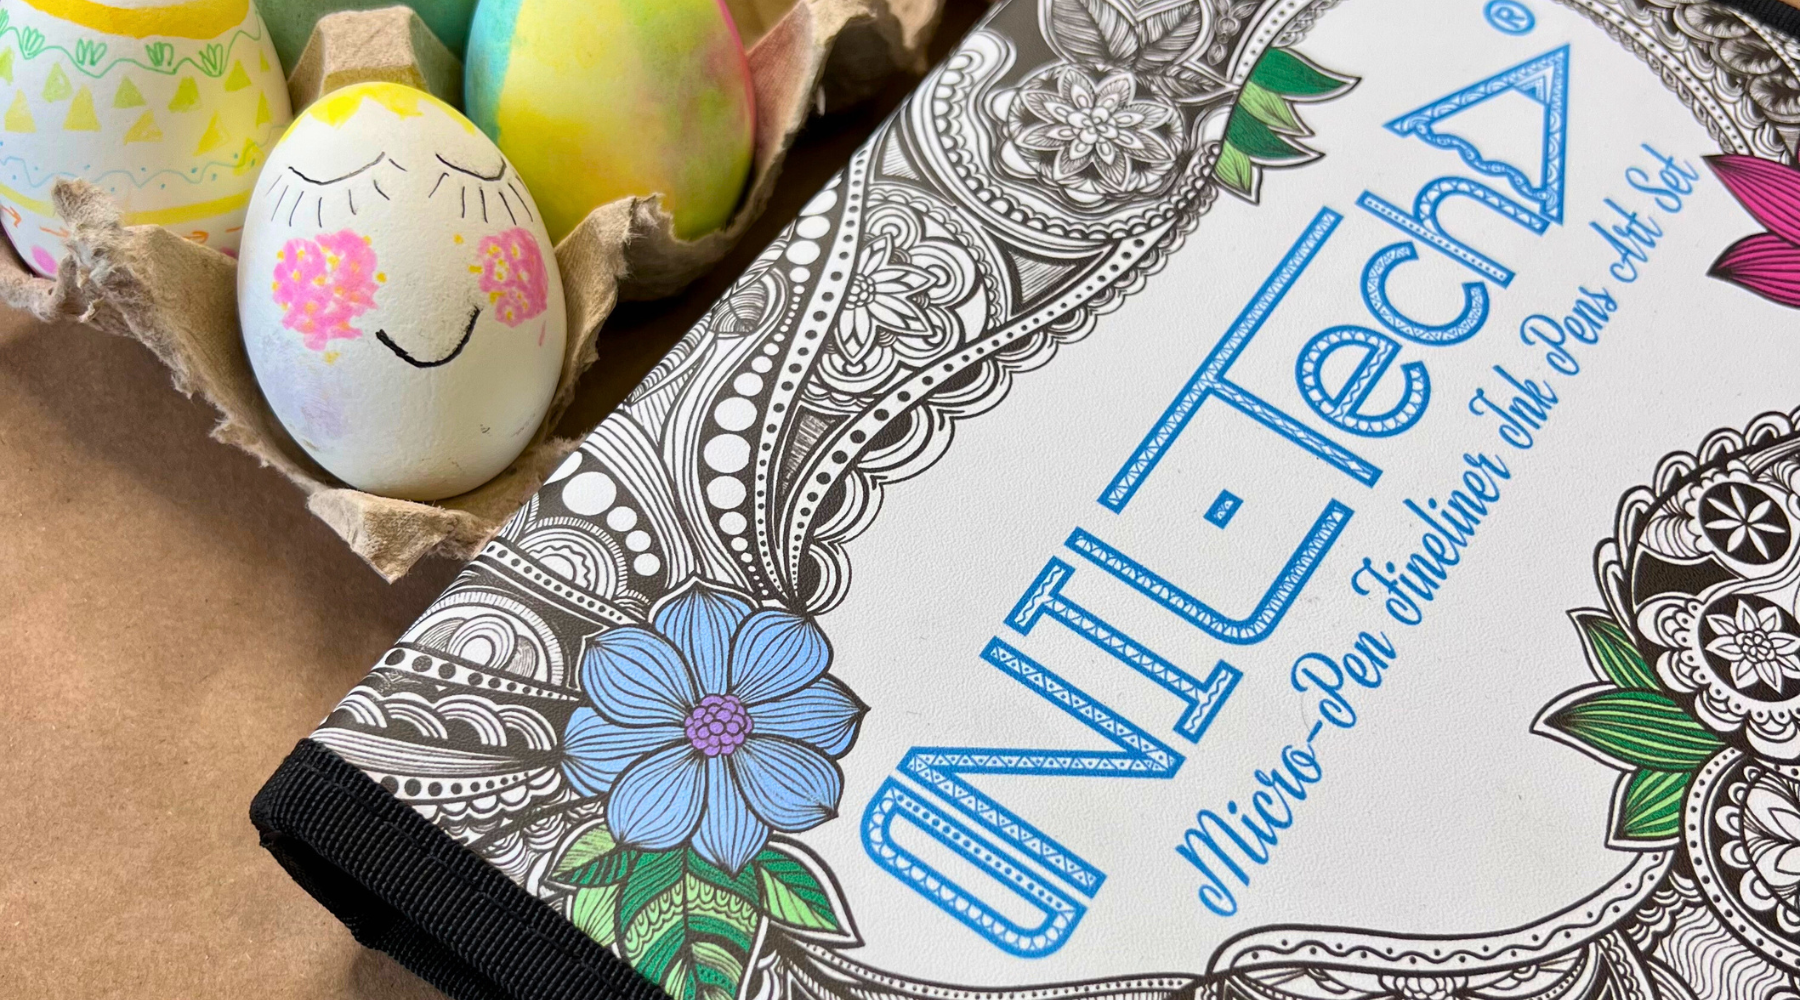
- Brush markers – we’re talking bright, beautiful NIL-Tech Dual Brush Pens or the trusty Crayola Markers for a pop of color.
- Ziplock sandwich bags – not just for your lunch anymore!
- A spray bottle or mist bottle – because every artist needs a little spritz here and there.
- Paper Towels and gloves: may want to keep your hands clean and wipe aways messes as they happen.
Dive Into Creativity with Two Unique Techniques
Sandwich Bag Magic: Color, spray, wrap, and reveal! This technique is like a magic trick, except you're the magician, and the result is a beautiful tie-dye egg.
Step 1. Color Selection: Choose between 3-6 brush pen colors for your design.

Step 2. Color Application: On a sandwich bag, apply your first color at the top. Sequentially add the remaining colors below.
Step 3. Moisten: Gently mist the sandwich bag with water.
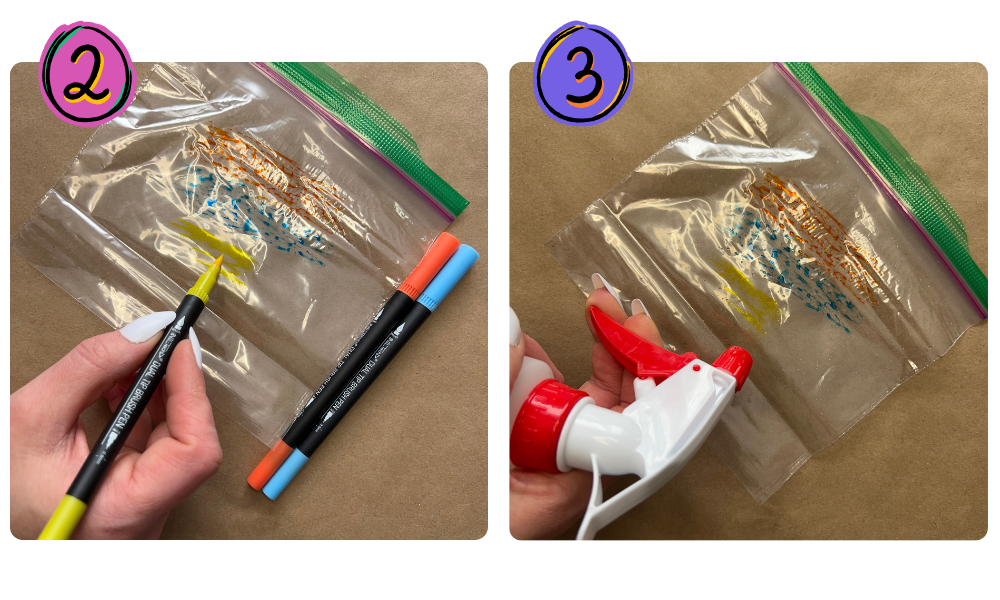
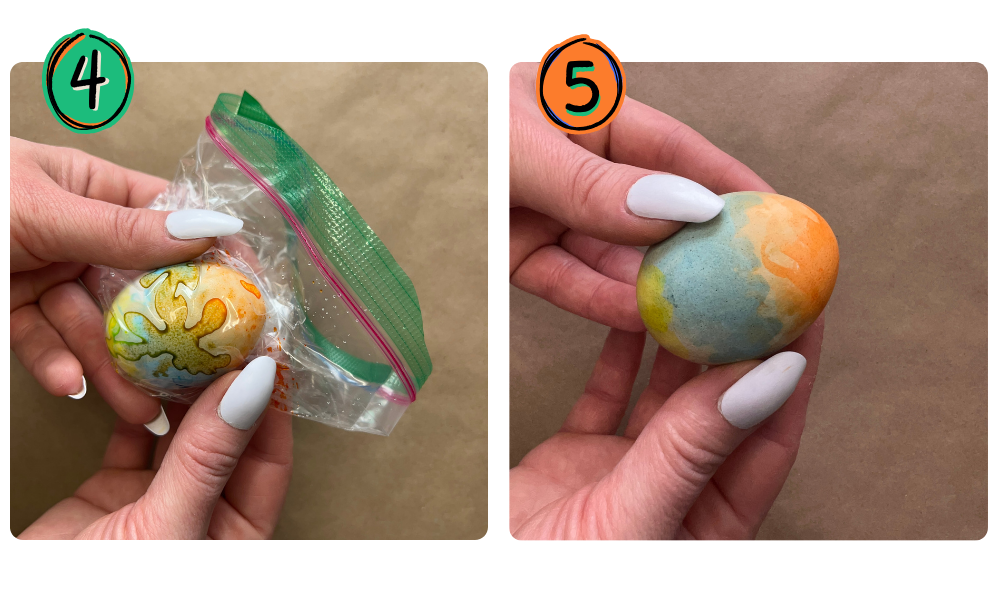
Step 4. Wrap: Encase the egg with the sandwich bag, color side in contact with the egg.
Step 5. Spread Color: Use your fingers to gently spread the ink over the egg through the bag.
Directly on the Egg: Draw your dreams in rainbow hues directly onto the egg and watch as a gentle mist transforms your design into a tie-dye masterpiece.
Step 1.Rainbow Outline (or any combo you'd like): Use brush pens to draw a rainbow sequence around the egg (start with pink, followed by orange, yellow, green, blue, and purple).
Step 2. Mist: Lightly spray the egg with water.
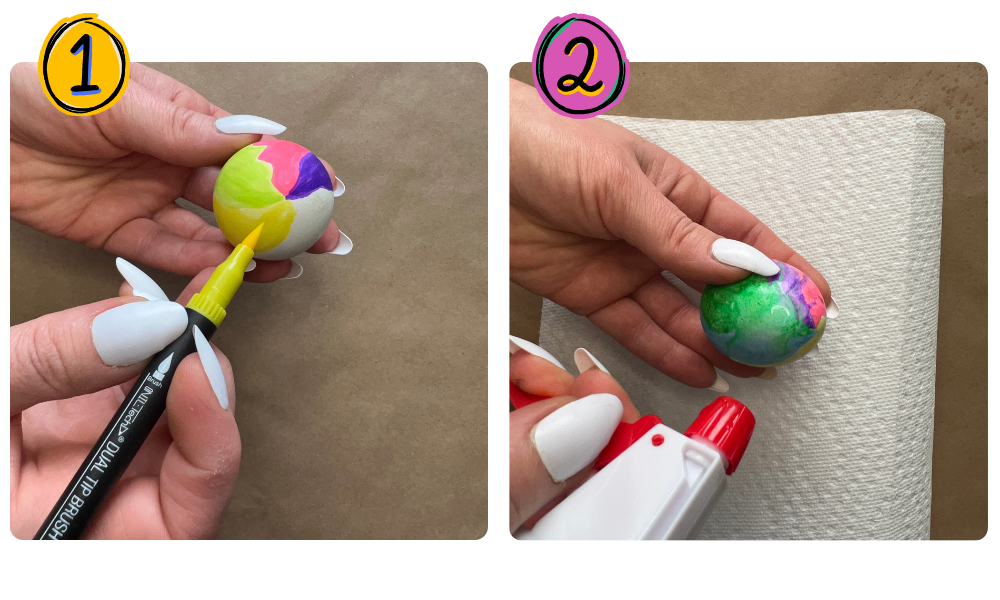
Step 3. Rotate and Mist: Turn the egg and lightly mist the other side.
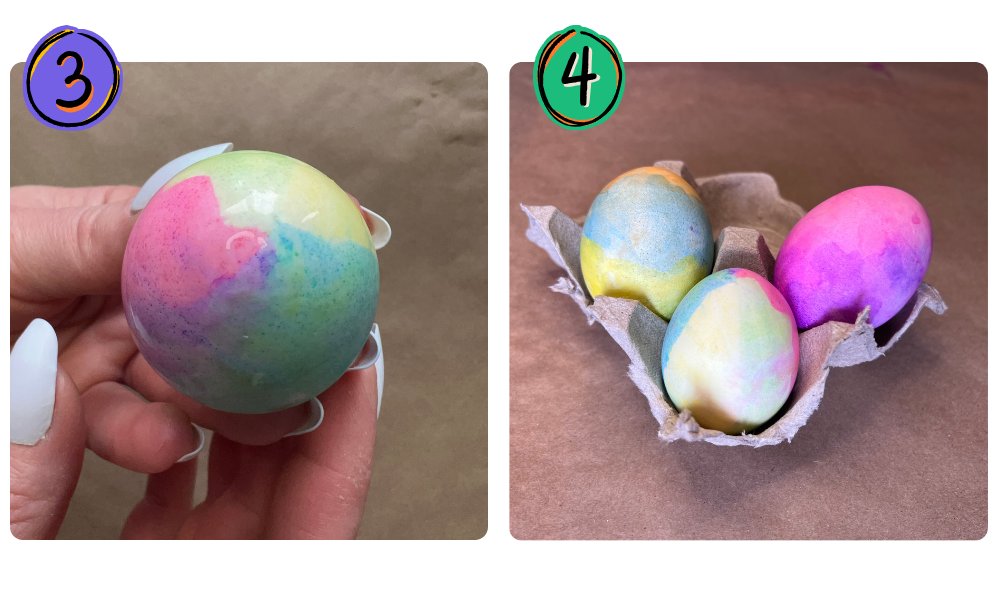
Step 4. Drying: Set the egg to dry on a rack or upright in a carton.
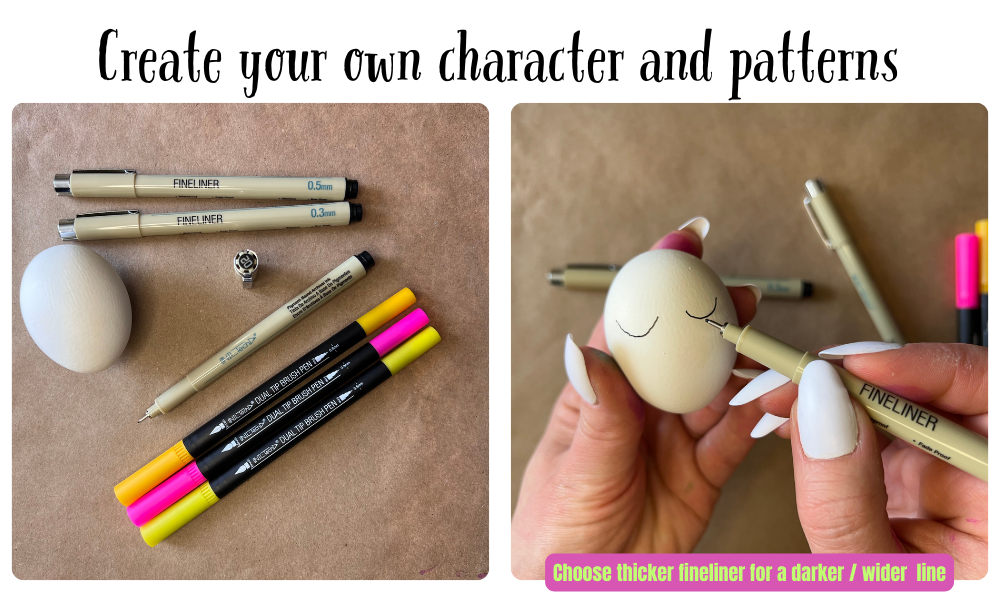
Final Touches: Once you’ve created your tie-dye base, you can embellish your eggs further. I used the Fineliners (set has a variety of sizes for greater detail) black NIL-Tech Markers to create a fun character. You can also use them atop of the tie dye for even more interesting look. Temporary tattoos also make for fantastic decorations. For a complete list on these additional decorations as well as temporary tattoos, check out the list post [here].
BONUS.


As we wrap up our vibrant journey into the world of tie-dye Easter eggs, we can't help but get excited about all the creative possibilities that lie ahead. If you've been following along with our tutorial and feeling inspired, but don't yet have the right tools to bring your visions to life, we have just the solution for you.
Our 36-piece art set is perfectly curated to fuel your creativity, not just for Easter, but for countless projects to come. Whether you're a seasoned artist or a budding creator, this set offers everything you need to explore, learn, and express yourself through art.
By ordering your set today, you'll not only unlock the door to a world of vibrant colors and high-quality tools, but you'll also gain access to our new weekly tutorials. Each tutorial is designed to inspire, teach, and help you grow as an artist, offering fresh ideas and techniques to try out with your 36-piece art set.
So why wait? Order now and join our community of creators who are just as passionate about art as you are. Let's embark on this creative journey together, and see where our imagination takes us next. With our art set in your hands and a new tutorial to look forward to each week, there's no limit to what you can create.

Happy creating, and here's to many more artistic adventures ahead!
Share your works for a chance to be featured!
Comment below or tag us @love_to_draw_nil (FB & Insta)
Use the following Hashtags: #LoveToDrawNIL & #EasterEggstravaganza
 |
Drawing Pencil SetExcellent GIFT IDEA - Non-Toxic and safe, easily portable and made with quality top-notch materials. Basic and innovative drawing supplies come together in NIL Tech set as an exceptional replacement for old-fashioned pencil boxes. The main attraction at any occasion from your drawing enthusiast friends, sketchers, artists to your kids or students boosting their creative projects and enjoy their ear-to-ear smile! |