Master the Art of Sugar Skull Drawing
Sep 30 , 2024
Hey there! This week, we're jumping into the colorful and meaningful world of sugar skulls—those beautifully decorated skulls you see during Día de los Muertos (Day of the Dead). Did you know that sugar skulls were originally made from—you guessed it—sugar? Yep, they were molded and decorated to honor and remember loved ones who have passed. But now, they’re also a fun and creative way to celebrate life and culture through art!
In this step-by-step tutorial, I’ll show you how to draw your very own sugar skull, complete with vibrant flowers and intricate details. Don’t worry if you’re just starting out—this guide is perfect for beginners and seasoned artists alike. By the end, you’ll have a stunning piece of art that’s uniquely yours. And if you want some extra tips, be sure to check out the video on our YouTube channel!
Fun fact: The colorful patterns you see on sugar skulls often represent the beauty of life and the cycle of death and rebirth—how cool is that?
Let’s get started!

Step 1: Prepare Your Template Start by finding a reference image of a skull. This could be a photo or a drawing—whatever works best for you. Lightly trace the skull onto a new sheet of paper using a pencil. Make sure to press lightly so you can easily erase these lines later if needed.

Step 2: Outline the Skull Now, begin drawing the basic outline of the skull. Sugar skulls are known for their stylized designs, so feel free to get creative with the shape. Thick outlines can give the skull a bolder look. For an extra decorative touch, give the eye sockets a flower-like edge and outline the nose area.

Step 3: Add Dots and Floral Details To make the eye sockets stand out, add small decorative dots around their borders—a classic feature of sugar skull designs. Flowers are another popular element, so let’s start by drawing a flower. Begin with a round center for each flower.

Step 4: Create the Petals From the center of the flower, sketch out the shape of each petal. Draw the petals turning slightly inward as you go around, giving them a dynamic and natural look. You can also add jagged edges to make the petals look more ornate. Don’t forget to embellish the petals with small decorations to enhance the overall design.

Step 5: Define the Teeth and Add Contrast Next, add details to the skull’s teeth. There’s no need to make them realistic—simple rectangular shapes or zipper-like lines will do. To add depth and visual interest, darken specific areas of your skull drawing, such as the eye sockets or the teeth. This will give your sugar skull more contrast and make it visually striking.

Step 6: Finalize Your Design At this point, you can get creative and add more shapes and decorations to your sugar skull. Try experimenting with different line thicknesses for a more intricate and polished look. Once you’re happy with your design, erase any leftover pencil guidelines to clean up your drawing.
Step 7: Add Vibrant Colors Now for the fun part—adding color! Use bold, bright hues to bring your sugar skull and flowers to life. Don’t be afraid to let your imagination run wild here; the more colorful, the better!
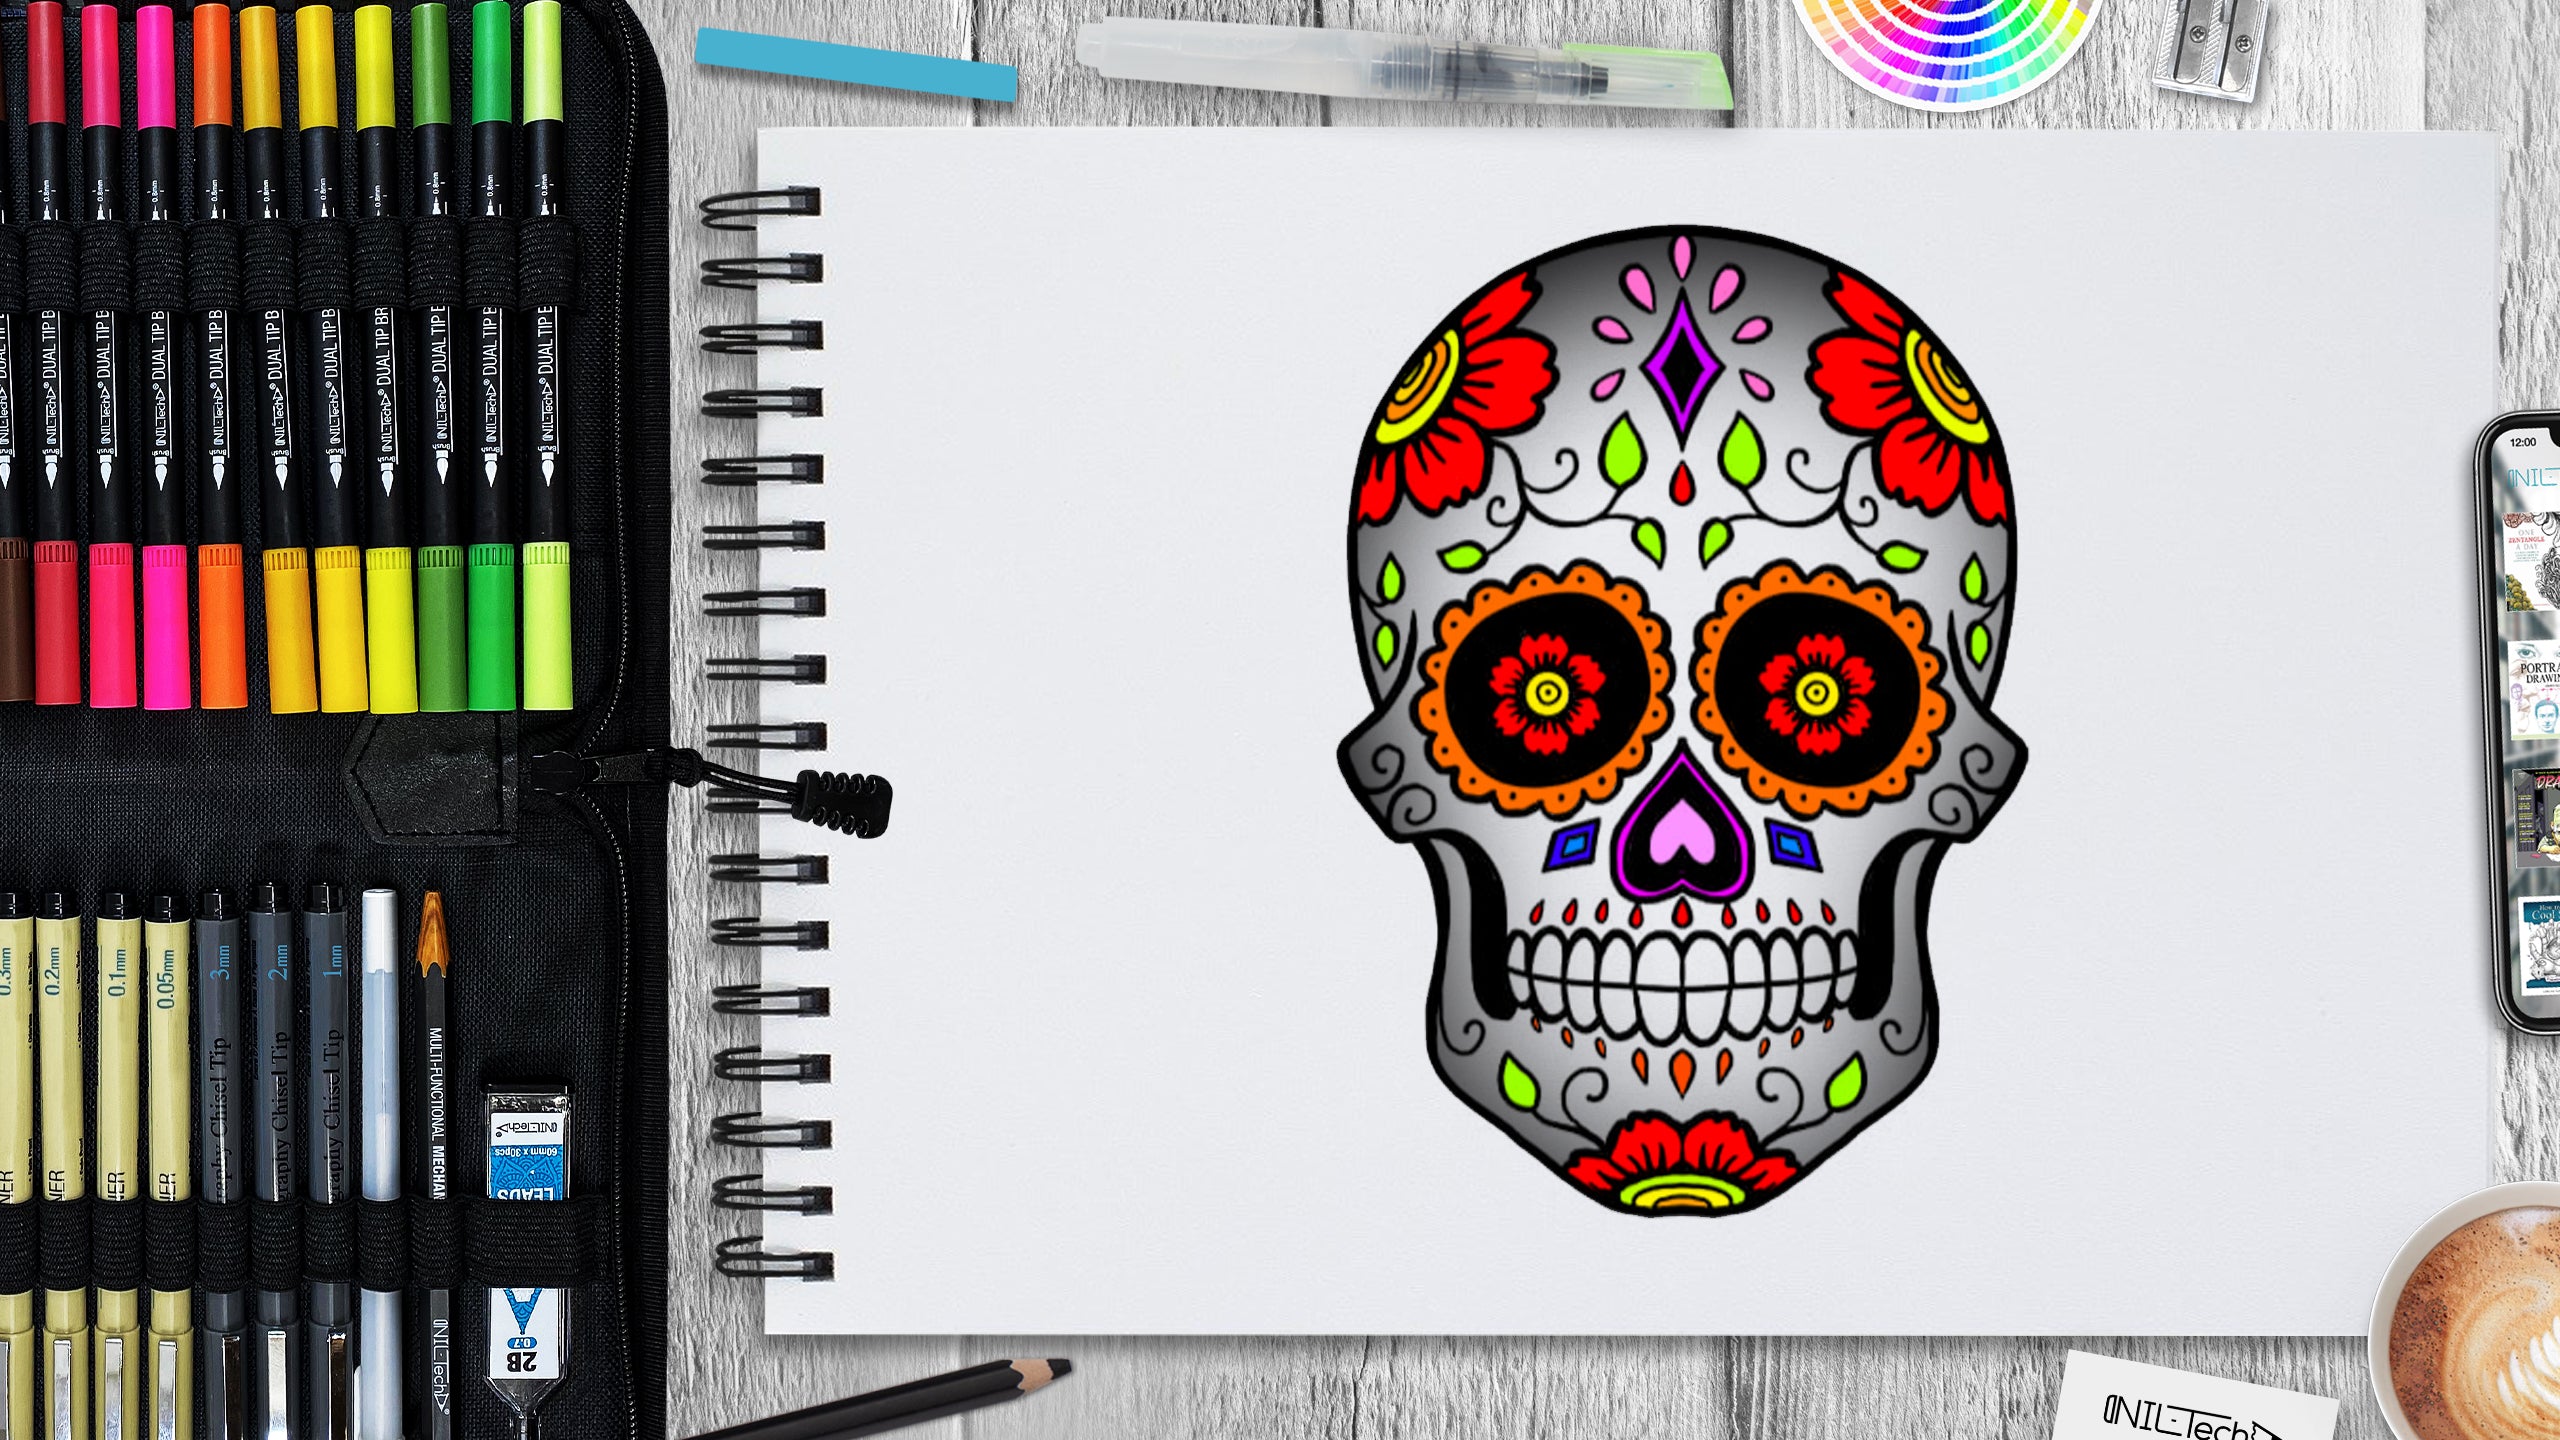
Step 8: Complete Your Artwork With your decorations in place and colors filling the design, your sugar skull is ready to shine. You’ve now created a beautiful, unique sugar skull drawing that reflects the rich cultural significance of Día de los Muertos.
Link to the video tutorial:
We really hope you enjoyed this sugar skull drawing tutorial! If you had fun, there are lots of ways you can help spread the word:
- Share our website with your friends and family.
- If you have a blog or website, feel free to link to this tutorial!
- Bookmark it for later or share your favorite tutorial on your social media.
And hey, what better way to show off your new skills than by sharing your artwork? 🎨
Most importantly, we’d love to hear from you! Drop a comment below to let us know what you think, and don’t be shy—share any ideas for future tutorials. Your feedback means a lot to us!
 |
Drawing Pencil SetExcellent GIFT IDEA - Non-Toxic and safe, easily portable and made with quality top-notch materials. Basic and innovative drawing supplies come together in NIL Tech set as an exceptional replacement for old-fashioned pencil boxes. The main attraction at any occasion from your drawing enthusiast friends, sketchers, artists to your kids or students boosting their creative projects and enjoy their ear-to-ear smile! |