Watercolor and Metallic Pencil Landscape Drawing Tutorial - Mountain Beach Serenity
Oct 03 , 2023
Hey there, fellow art enthusiast!
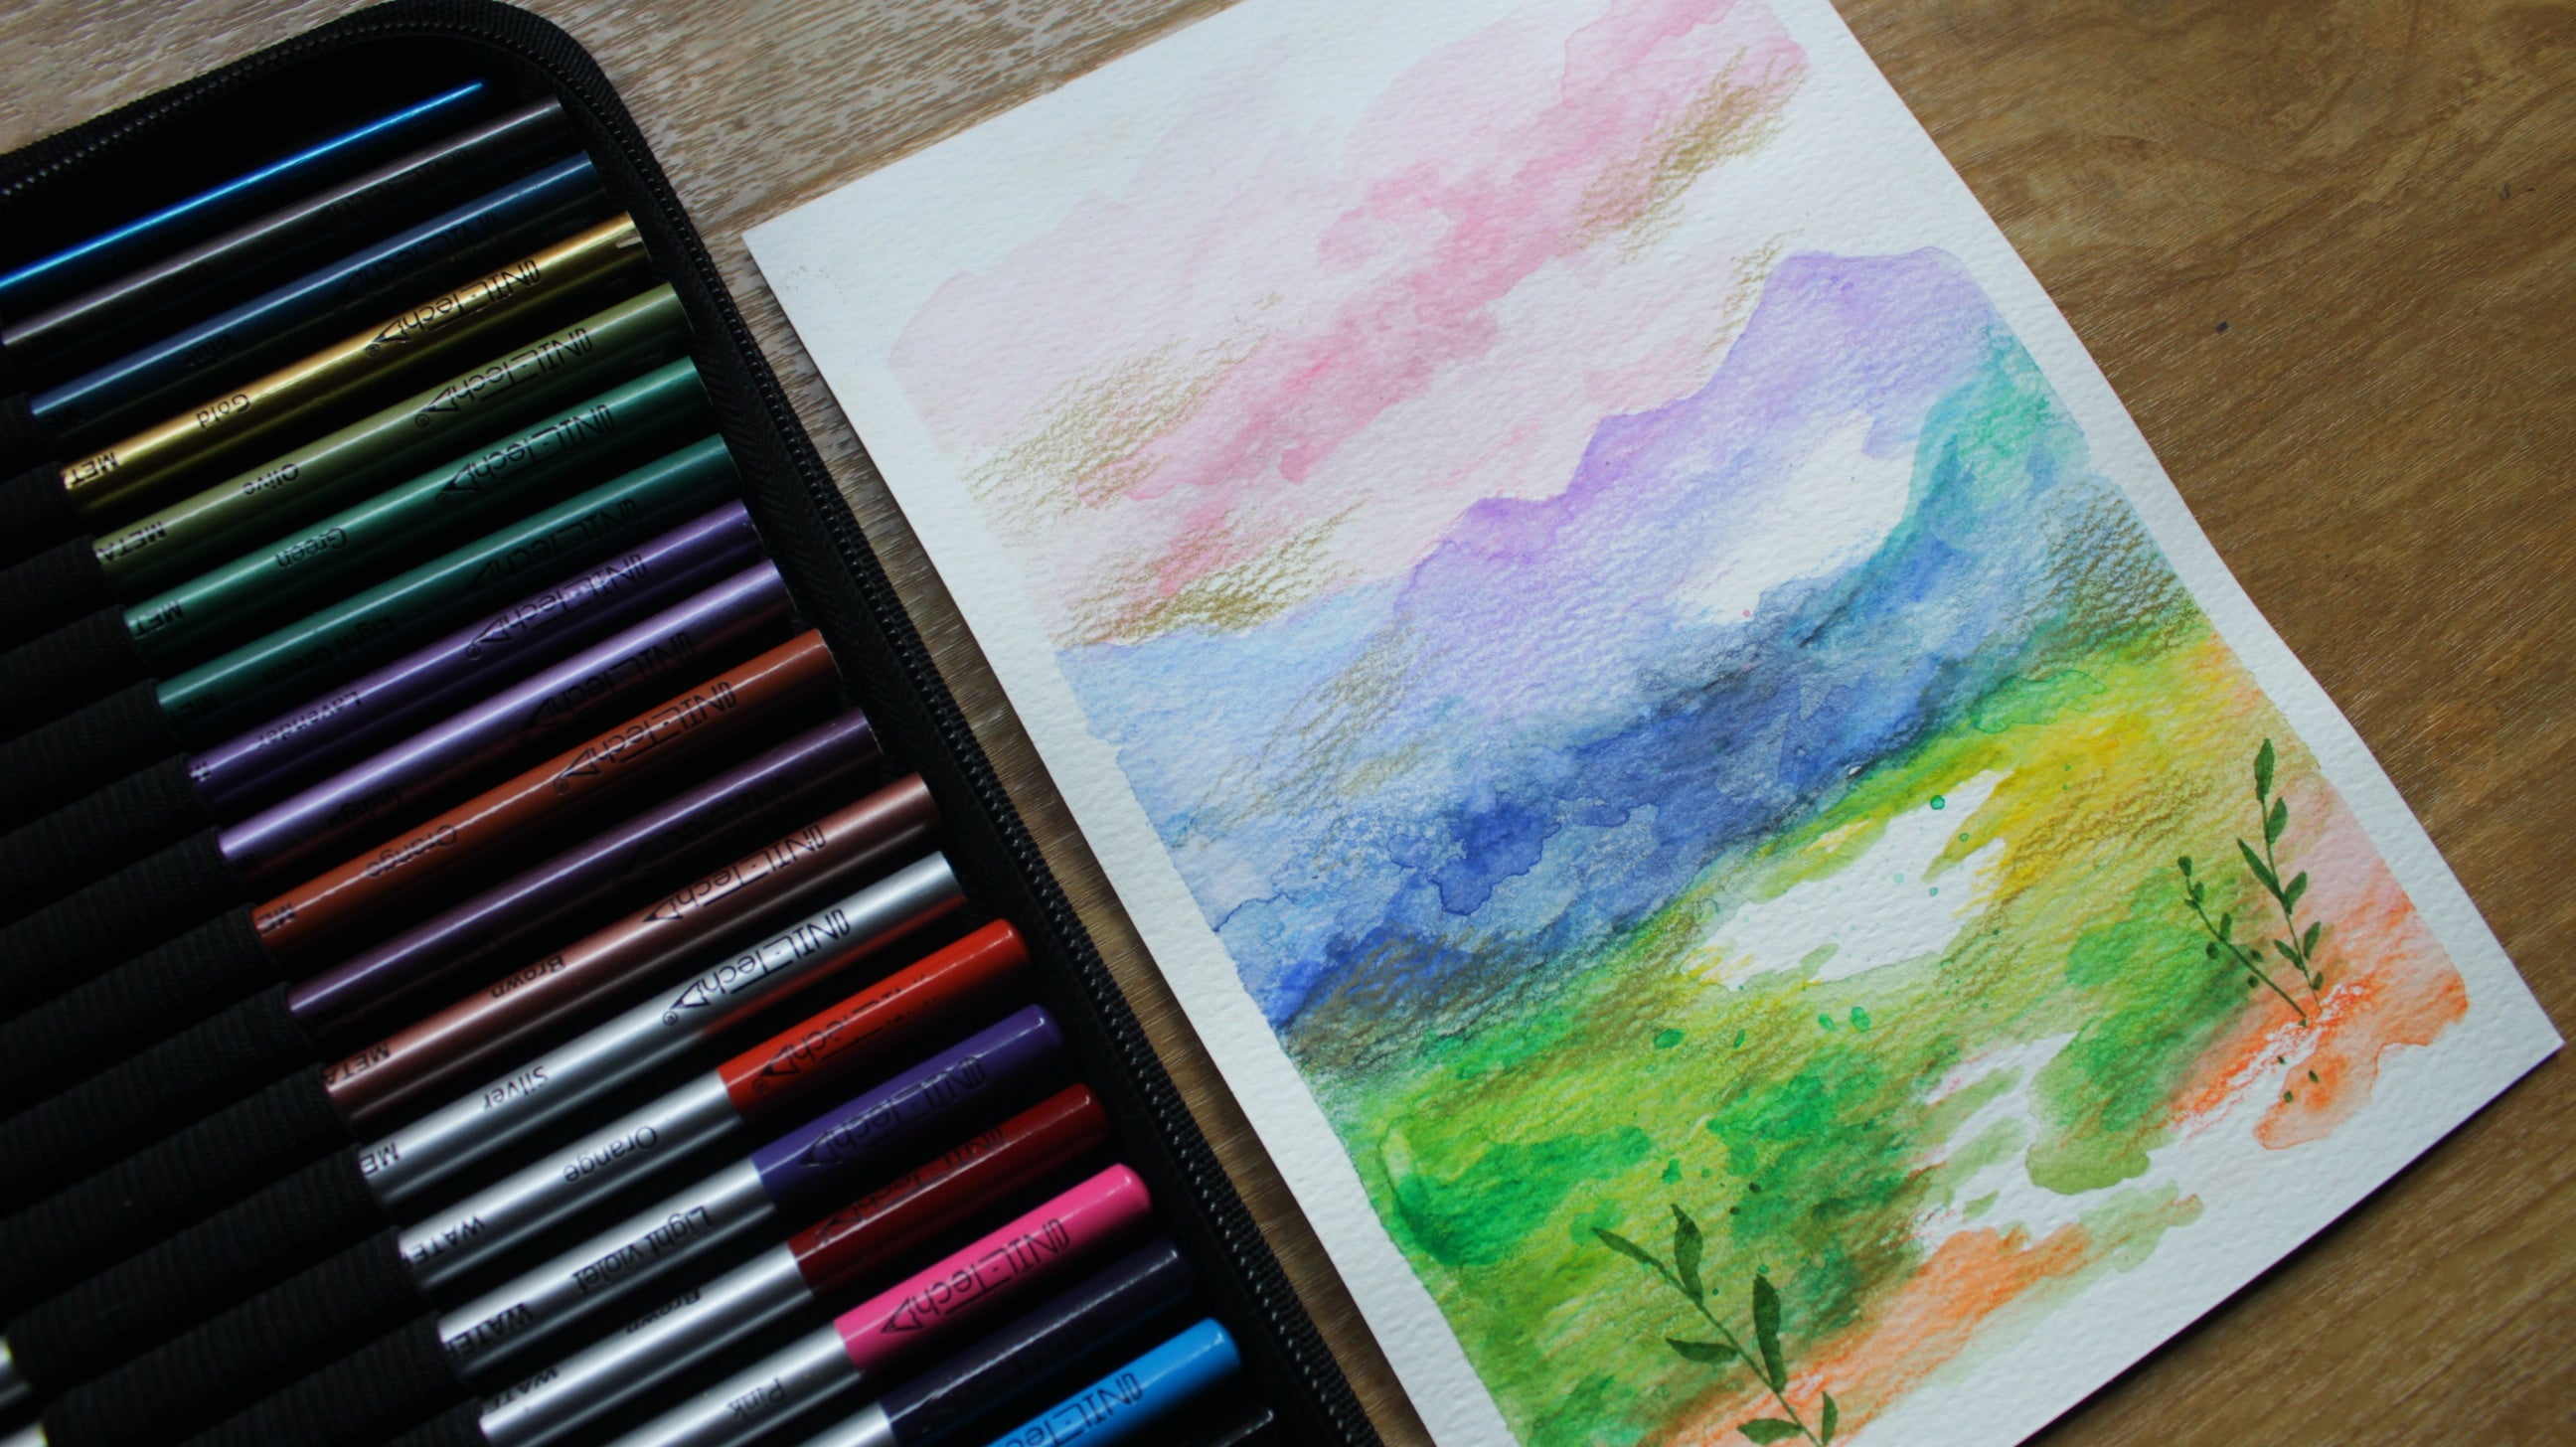
Welcome to our mountain landscape drawing tutorial, where we're about to embark on a creative journey together. In this step-by-step tutorial, we'll show you how to craft a breathtaking mountain scene using watercolor pencils and add a touch of magic with metallic pencils. Join us as we explore every nuance, from the grandeur of the mountain peaks to the tiny details that make your artwork pop! Whether you're a seasoned artist or just dipping your toes into the world of watercolors and metallics, we're here to inspire and elevate your artistic prowess.
Here's what we've got in store for you:
- 0:00:00 - Let's Get Started: Materials NT 55PC Art Set + Watercolor Paper + Bonus: Brush Pen & Metallic Color Pencil!
- 00:10:25 - No Sketching or Outline necessary! Since we're using watercolor pencils, which allow you to easily control where color is places - just like regular pencils, we start directly with watercolor pencils.
- 00:34:11 - Starting with Pink at the top, using it instead of blue for our sky and clouds.
- 00:56:12- Light Violet Next. Use it to shape out the mountain peeks, making light strokes - building color, you can always add more!
- 01:23:28 - Light Blue, going over the previous color light violet, starting slightly below the peeks.
IN ORDER TO PREVENT COMPLETE BLENDING AND TURNING EVERYTHING INTO GRAY/BROWN: Start each next color layering slightly lower than previous.
- 01:54:23 - Dark Blue. Remember to leave some parts blank!
- 02:07:19 - Black. Layer over dark blue, bottom and middle.
- 02:19:14 - Yellow. Layer under black, strokes from outside in.
- 02:35:27 - Orange. Layer over yellow, on the sides.
- 02:49:27 - Pink. Layer over orange.
- 03:03:24 - Light Green. Layer lightly over top of yellow.
- 03:15:06 - Dark Green. Layer lightly over light green and parts of black.
TIME TO CREATE MAGIC! Activate Watercolor Pencils into Watercolor!
- 03:35:07 - Place droplets of water all over, starting at the top - PINK.
- 04:14:27 - Make sure to leave the blank spots, do not drag the color out into them.
- 04:29:17 - Activating the Peeks. Do not blend! Keep the shape of our peeks!
- 04:51:02 - Start to blend below the peeks.
- 05:29:19 - Blend yellow & greens, LEAVING Our blank spots!
- 05:49:30 - Blend Orange carefully without dragging it into the dark above.
ADMIRE the beautiful landscape thats coming together. Now is a perfect time to ADD Color and Depth.
- 06:09:23 - ADD Depth by grabbing color right from the pencil. Using a wet nylon brush pick up color from the pencil tip. Starting with Pink.
- 06:40:23 - Dark Blue using the same method as above.
- 07:05:03 - Dark Green same method and tapping the brush at the pencil tip let green splashes drop.
BONUS DETAIL #1 : Green Brush Pen (36PC Art Set)
- 07:36:18 - Using brush pen draw a stem with leaves on each side of the landscape. Creates almost a 2D effect, doesn't it?
ALLOW YOUR WATERCOLOR LANDSCAPE TO DRY COMPLETELY PRIOR TO ADDING BONUS DETAIL #2 : METALLIC COLOR PENCILS
Metallic accents have been such a popular esthetic lately, what a great way to bring light to dark or accent pastel colors! Let's try!
- 07:57:24 - GOLD. Add to accent pink and lighten the darkest parts, bringing shimmer and reflective properties.
OUR 55PC ART SET INCLUDES 12 Metallic Color Pencils! That's besides 12 Watercolor and Full Range of Sketch Pencils! Choose the one that speaks to your heart, adding as many as you like!
BE READY, GET YOUR
55PC ART SET HERE TODAY!
Join us in this creative adventure, and by the end of the tutorial, you'll proudly display your own magnificent mountain landscape. Be sure to give us a thumbs up, share your thoughts in the comments, and hit that subscribe button for more art inspiration.
And most importantly, share your completed artwork with us on social media! Let's explore the beauty of mountain landscapes with watercolors and metallic pencils, together, as friends!
 |
Drawing Pencil SetExcellent GIFT IDEA - Non-Toxic and safe, easily portable and made with quality top-notch materials. Basic and innovative drawing supplies come together in NIL Tech set as an exceptional replacement for old-fashioned pencil boxes. The main attraction at any occasion from your drawing enthusiast friends, sketchers, artists to your kids or students boosting their creative projects and enjoy their ear-to-ear smile! |


