How to Draw a Cute Turkey: Easy Step-by-Step Drawing Tutorial for Kids and Beginners
Oct 13 , 2024
Drawing is not only a fun activity but a great way to express creativity, improve fine motor skills, and learn new techniques. With Thanksgiving right around the corner, why not celebrate by learning how to draw a cute turkey? 🦃 Whether you're a beginner or looking for a fun project for your kids, this step-by-step drawing tutorial will guide you through the process of creating an adorable turkey illustration from scratch.
In this blog post, we'll walk you through each step with detailed instructions, so grab your pencils, paper, and let’s get started! You can also follow along with our instructional pictures and YouTube video tutorial for more visual guidance.

Step 1: Draw the Basic Shape of the Turkey
Start by drawing two circles—one for the body and one for the head. The larger circle will be the turkey’s body, and the smaller circle on top will represent the head. These basic shapes will help you form the overall structure of your turkey.

Step 2: Add the Head, Eyes, and Beak
Next, it’s time to add the turkey’s facial features. Inside the head circle, draw two small black circles for the eyes. To make the eyes look more realistic, add a small white circle inside each eye for a shiny effect. For the beak, sketch an upside-down triangle right below the eyes. This will give your turkey a fun and friendly look.
Now, add some curved lines around the body to represent the feathers. Don’t forget to draw the feet under the body!

Step 3: Draw the Neck and Wings
With the head and body in place, connect them by drawing a long neck. On either side of the body, add wings using curved lines. To make the wings more interesting, draw small details such as feather patterns.
Don’t forget the turkey's snood—the funny-looking fleshy bit that hangs over the beak. Draw this by sketching a curved line over the beak.

Step 4: Refine and Clean Up the Outline
Erase any unnecessary guidelines that you used earlier, leaving behind a clean and simple outline of your turkey. This step is important for making your drawing look polished. You should now have a clear outline of the turkey’s shape, including its body, wings, and facial features.
You can also add a small red circle under each eye and color in the snood for added detail.

Step 5: Add Color to Your Turkey
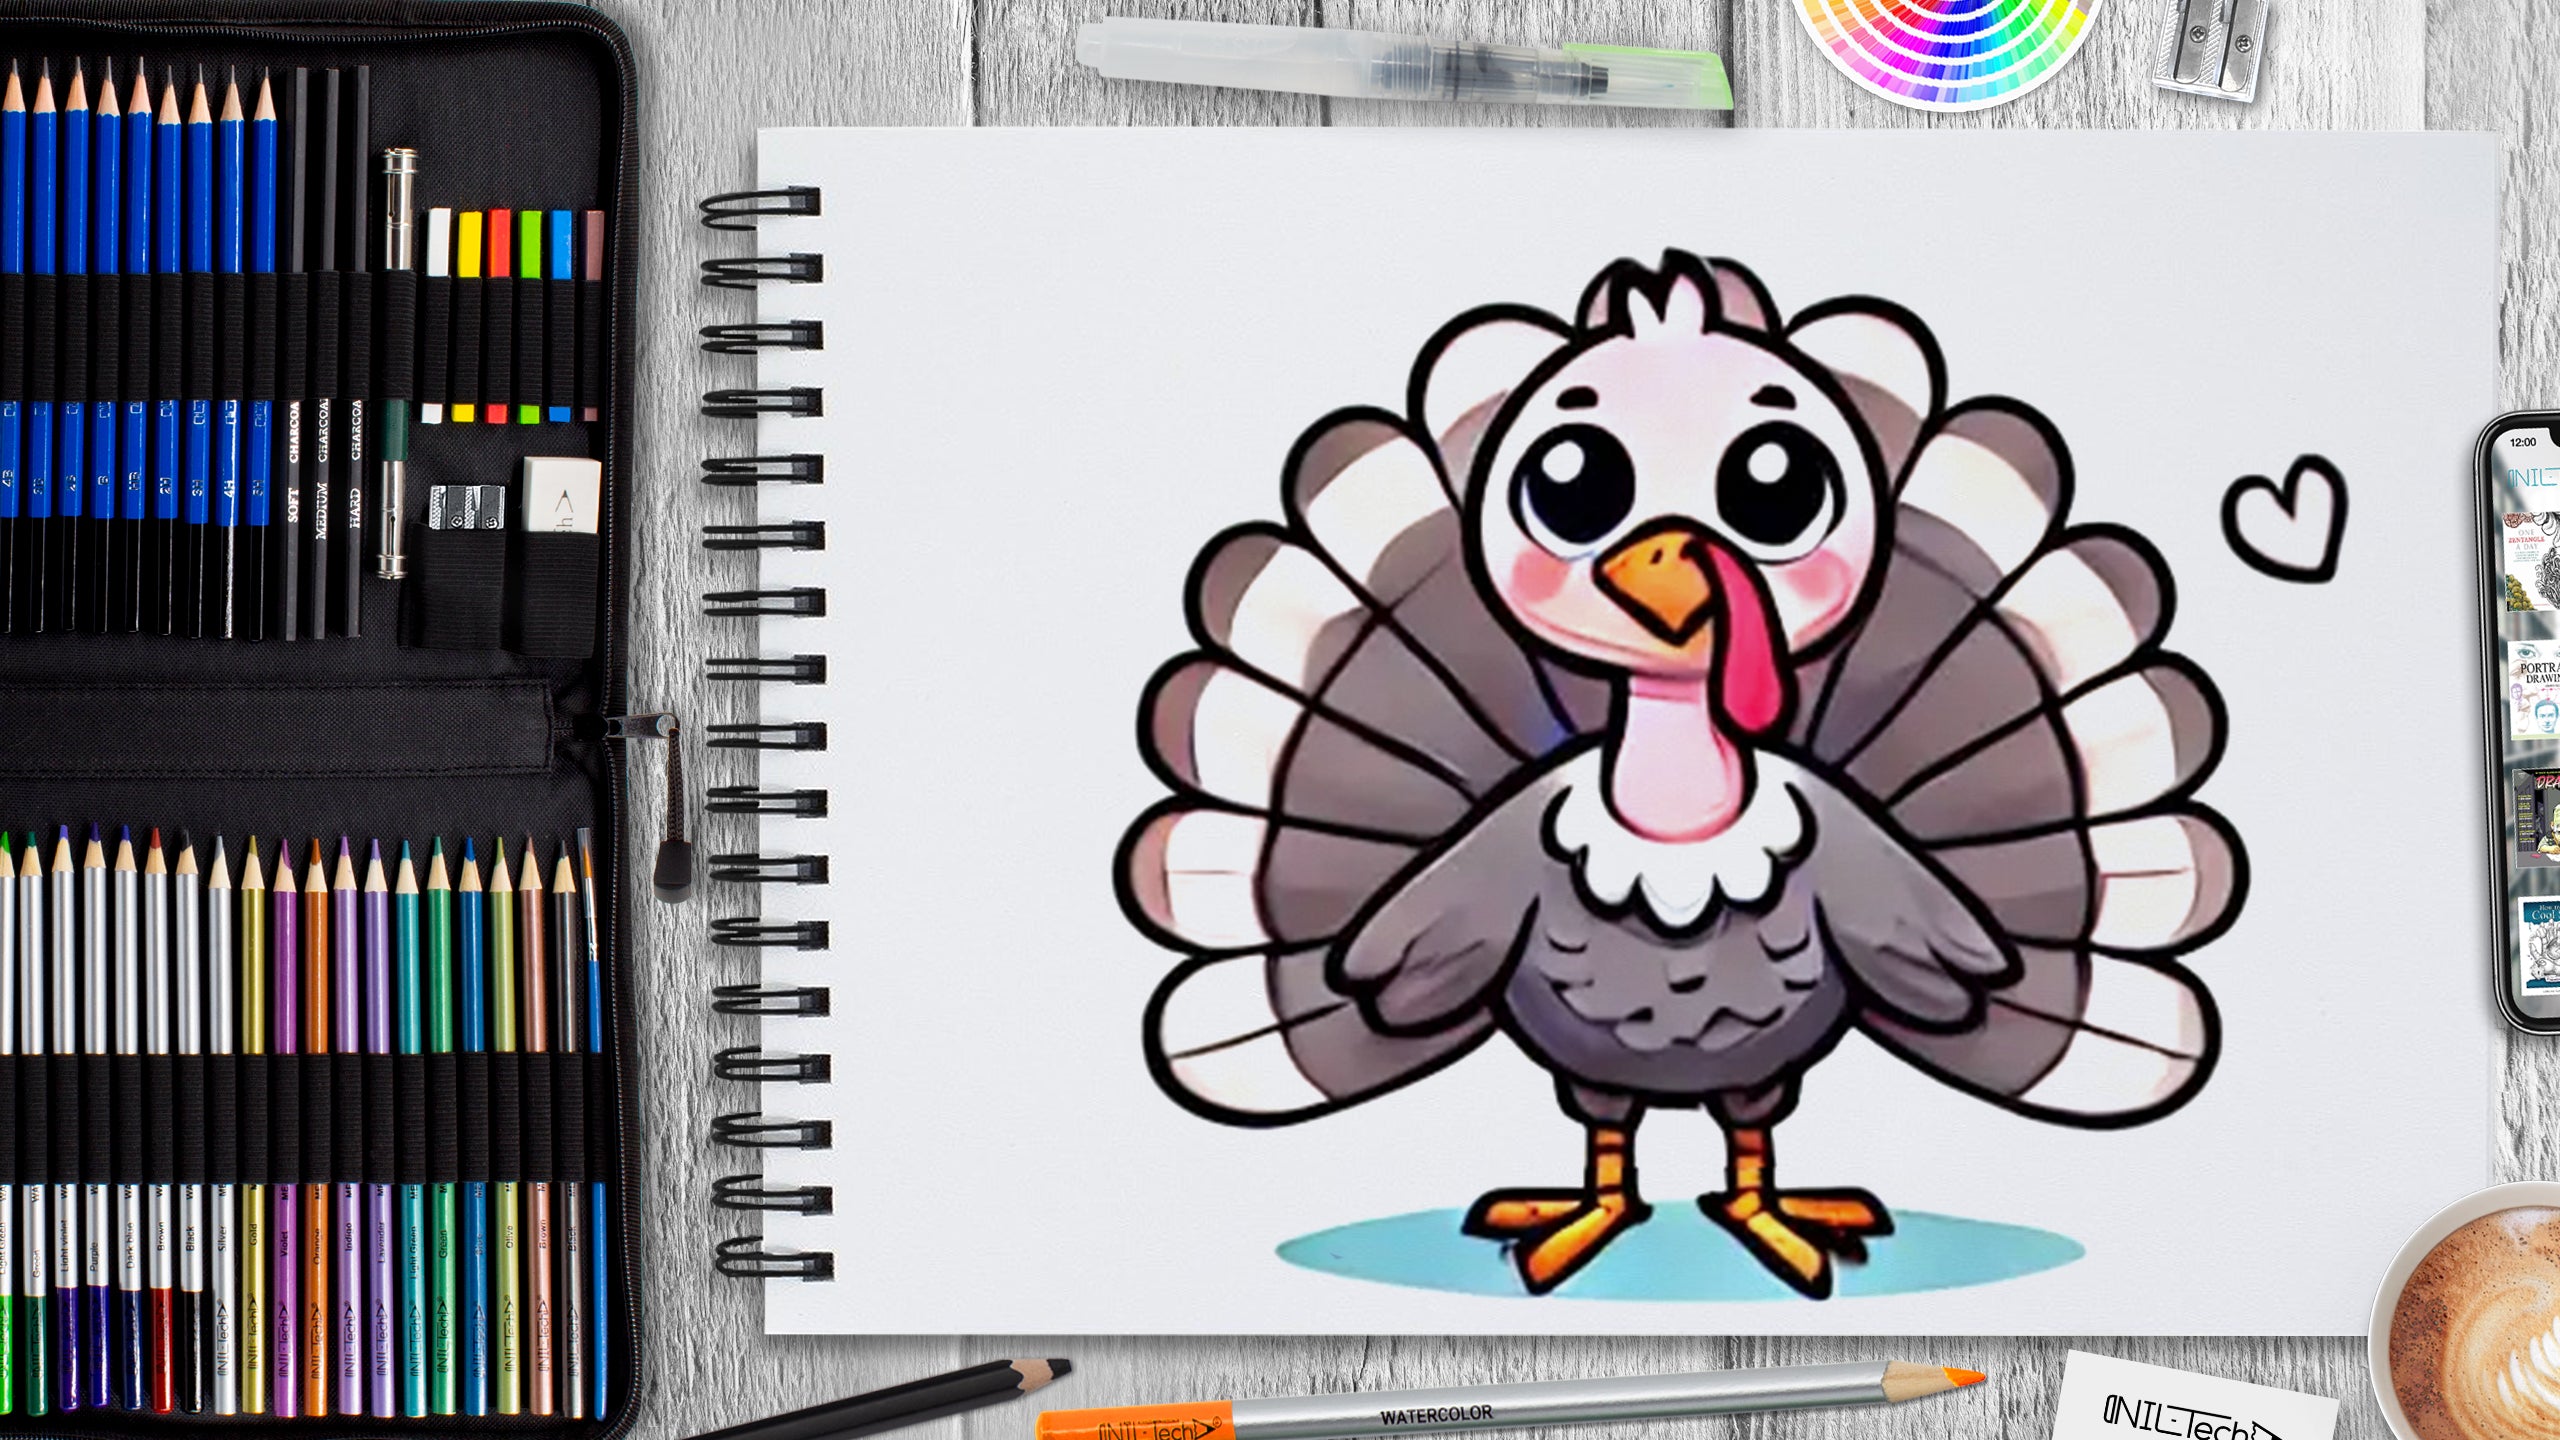
Now it's time to make your turkey come to life with color! Use shades of light brown and gray for the feathers. For the head, use light pink, and for the feet, color them in yellow and orange. Around the neck, add a touch of white to highlight the feathers. Be creative—turkeys have vibrant features, so feel free to experiment with different colors.

Step 6: Final Touches and Shading
To give your turkey a more 3D appearance, add darker shades to the feathers and other features to create depth. This will make your turkey look more realistic. Add a blue shadow underneath the turkey to help it stand out, and as a fun touch, you can draw a small heart in the top right corner of your drawing.
Conclusion: Share Your Masterpiece!
Congratulations! You’ve successfully drawn an adorable turkey. Whether you're creating this as a fun project for Thanksgiving or simply love drawing cute animals, we hope you enjoyed this tutorial. Don’t forget to share your finished turkey with us! Use the hashtag #NILTechDraws on social media, and tag us to show off your work @lovetodrawnil.
Want more tutorials? Check out our YouTube channel for more step-by-step drawing guides and creative projects!
Watch the Full Video Tutorial on YouTube
For a complete walkthrough, check out our YouTube tutorial, where you can follow along step-by-step with visual instructions.
 |
Drawing Pencil SetExcellent GIFT IDEA - Non-Toxic and safe, easily portable and made with quality top-notch materials. Basic and innovative drawing supplies come together in NIL Tech set as an exceptional replacement for old-fashioned pencil boxes. The main attraction at any occasion from your drawing enthusiast friends, sketchers, artists to your kids or students boosting their creative projects and enjoy their ear-to-ear smile! |


1 Comments
hi can you send me a comment so we can talk